| (4 intermediate revisions by 2 users not shown) | |||
| ws-class-props | |||
|---|---|---|---|
| Line 1: | Line 1: | ||
| − | + | {{Doc properties | |
| + | |Doc subject=DevOps:Doc/PageSync | ||
| + | |Subject version=1.5,2.0 | ||
| + | |Doc parent=DevOps:Doc/PageSync/1.5/Using PageSync | ||
| + | |Doc sort order=40 | ||
| + | |Doc target group=User | ||
| + | |Doc synopsis=Easily create packages of pages, templates and files to share with others | ||
| + | }} | ||
| ws-page-props | |||
| Line 1: | Line 1: | ||
| − | + | ||
| − | |||
| − | |||
| − | |||
| − | |||
| − | |||
| − | |||
Latest revision as of 22:18, 22 September 2022
With PageSync you can also select pages or files and create a PageSync Share File from them.
A PageSync share file can be used on another Wiki with PageSync installed and have those pages or files be installed there.
The big difference with the Backup option is that you can choose what pages or files will be included based on tags. Also restoring a backup on another Wiki will add the contents to PageSync to monitor them as well. Restoring a PageSync Share option only adds the pages or files to a wiki once. Therefore a PageSync share file could be used to install a set of templates, widgets, pages and files to add functionality to your wiki.
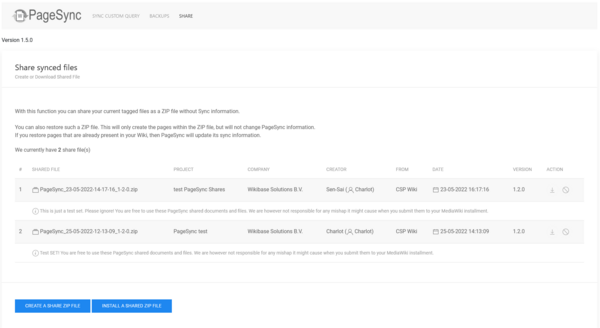
If you navigate to the PageSync Special page and click on the SHARE tab you will see an overview of the shared files you have created if you already have any.
This page allows for you to download a PageSync Share file or delete it from your server. There are also two button to create a new PageSync Share file or install a PageSync Share file.
Installing a set of pages through a PageSync Share file is done by sharing the URL where the ZIP file can be downloaded.
On this screen you can type the download URL. This can be e.g. a github link.
When you enter the URL and click the download and preview button, PageSync will check if the file is valid and will take you to the next page where you can view details information on the PageSync Share File.
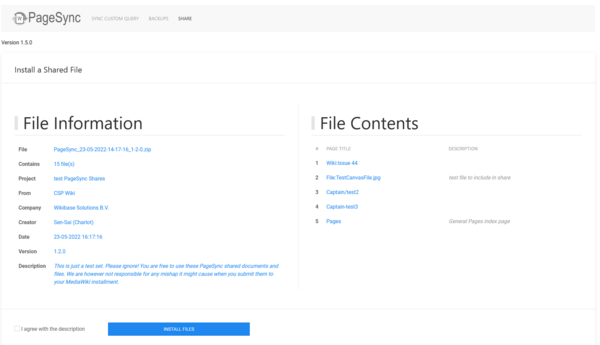
The Preview page will show you all the information available before installing the PageSync Share File. You also need to agree with the description within the File information.
Once you click the INSTALL FILES button, PageSync will install all the pages and files that are in the ZIP file.
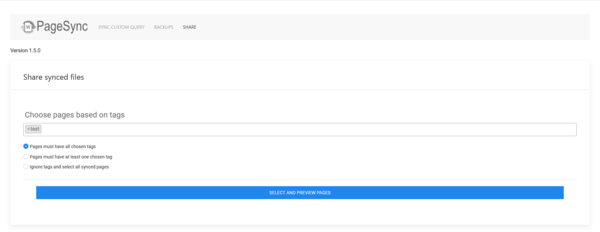
If you click the create the button create a share ZIP file, you will get a new screen where you select pages or files based on their tags.
You have three options there..
- Pages must have all chosen tags
- Pages must have at least one chosen tag
- Ignore tags and select all synced pages
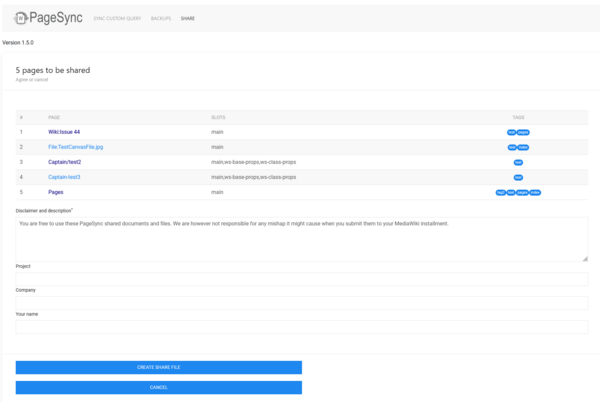
After clicking the Select and preview pages-button you will get an overview of the selected pages and files.
You will also need to add a Description/Disclaimer to the to be created Share File.
Project, Company and Name are optional. PageSync will always add your name and the name of the Wiki where you are creating the PageSync Share file from.
This information will be shown when someone wants to install you PageSync Share File.
Once you click on the Create share file-button, you will go back to the main PageSync Share page with an overview of your PageSync Share Files.


